
Internal GK-5 Install (part 2)
The existing Synapse jack plate is just big enough to house 2 panel-style 1/4” jacks side-by-side. I did a little dimensional sketch to make sure. The hex nuts on the rear of these may interfere, but I have a secret weapon to deal with that if needed.
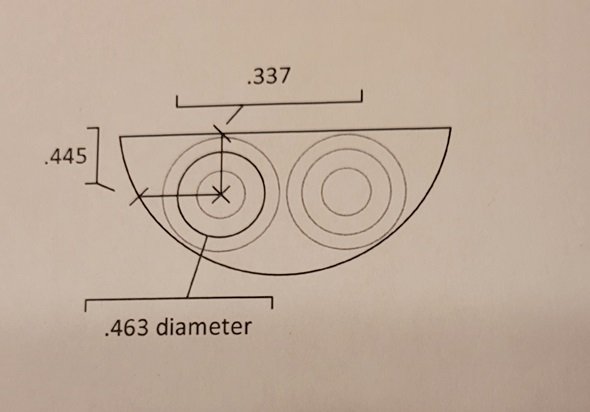
The drawing (which is supposed to be actual size) looks good against the actual part…

The two very interrupted cuts in that steel plate will be tricky, but that’s a problem to tackle later.

As I usually do for stuff like this, I used CAD (Cardboard-Aided Design) to get the profile of the control plate aesthetically pleasing as well as nailing the exact location and size of the notch needed for the GK-5 pickup assembly.
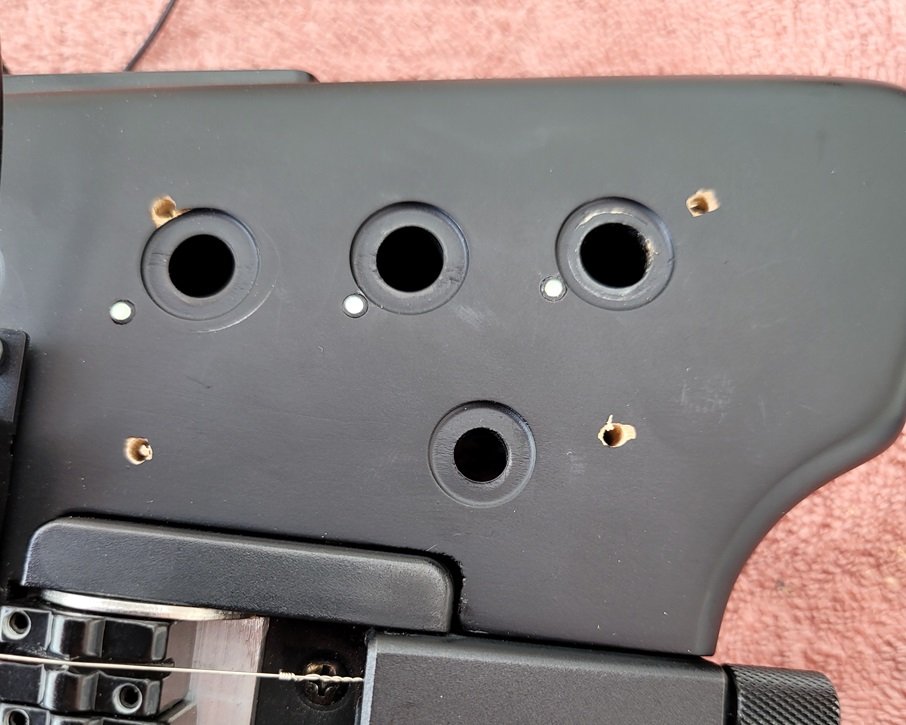
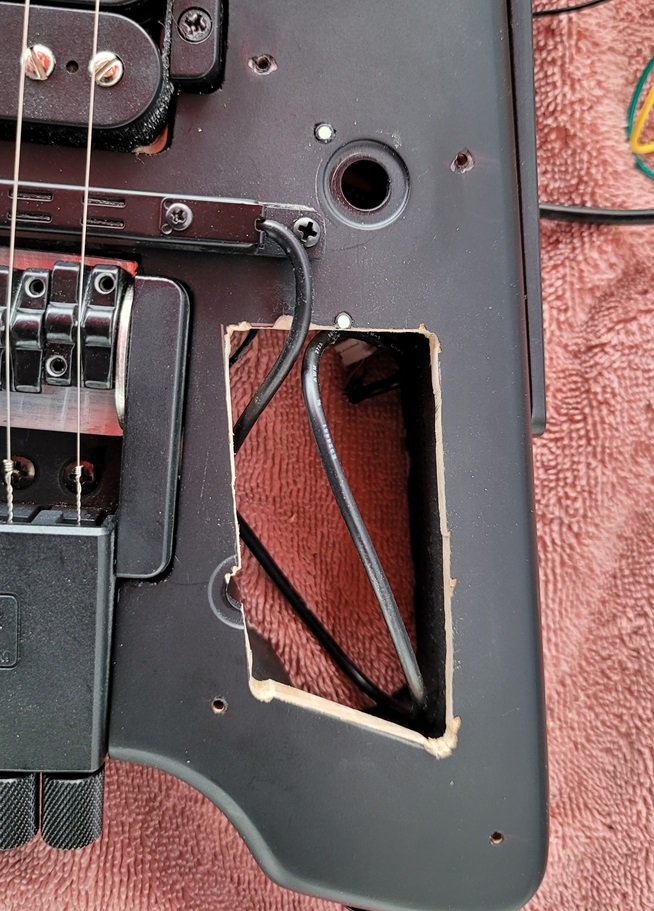
The control cavity will need a skylight installed so that the new control plate and relocated volume, tone, and pickup coil selection controls can all get condensed, and the factory holes can all get covered/deleted.

I drilled through from the rear with a narrow bit to locate the corners of the area to be cut out…

Then I enlarged those from the face of the guitar so that I could easily maneuver my jeweler’s saw to make the cuts.


I used a straight edge and pencil to make sure I cut as straight and true as I could…

And then slowly, carefully cut out the shape.

The cardboard template I made earlier got traced onto some MDF as a router template.

The band saw ate right through that stuff…

And I quickly had a solid, accurate template, ready for some finish sanding for smooth edges and curves.

Some carpet tape on the back of my .090 vinyl pickguard blank and a trip around the router bit for a nice bevel on three sides.

The rectangular notch was easy with the jeweler’s saw and a three-corner file.

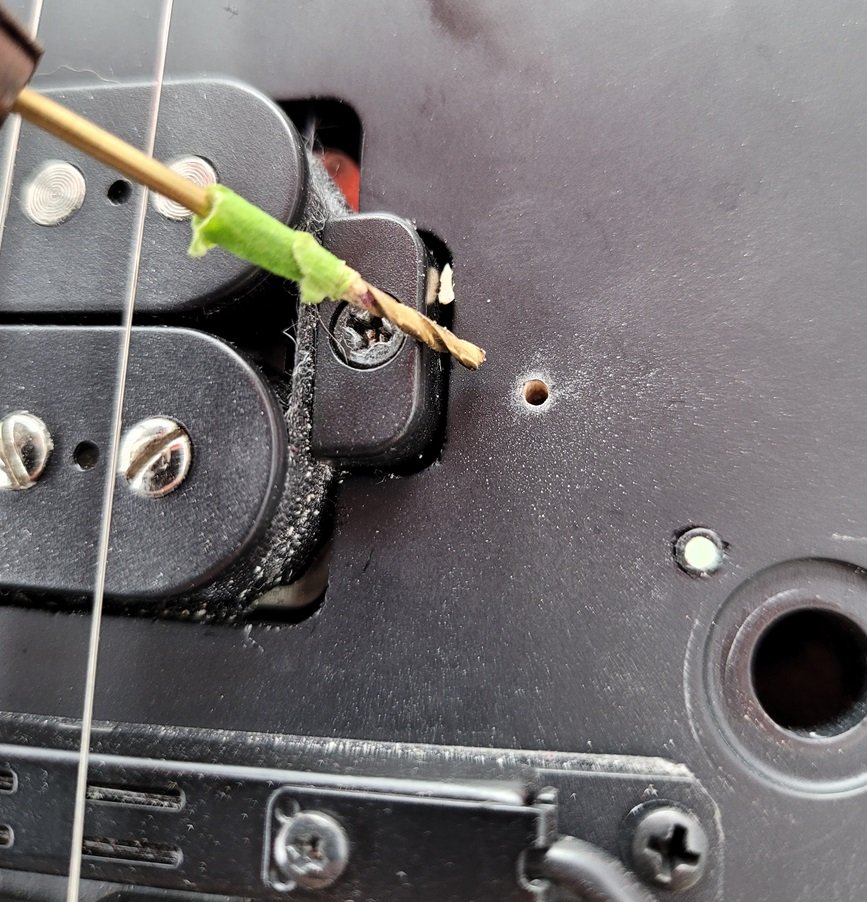
I used a pencil and eyeball to sketch-in the locations of the four mounting screws.

Then drilled and countersank them on the drill press for some degree of uniformity/repeatability.

Test fit looks good.

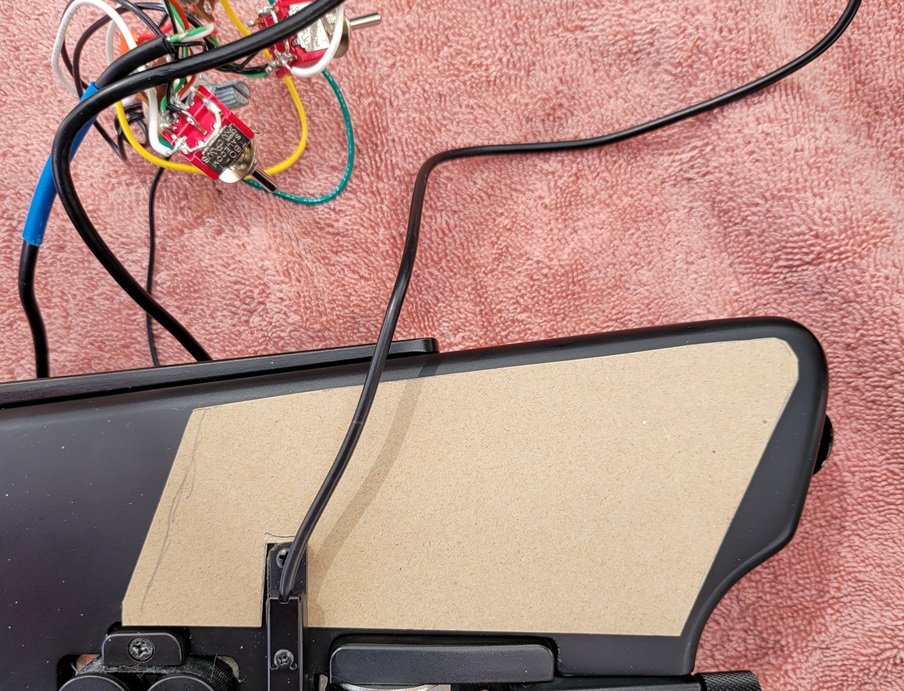
The opening for the hex pickup cable is plenty big now…

A rat tail file quickly made a nice little viaduct through the control plate.

I took down the edge of the opening with a file to soften the cable’s route. I did the same on the back of the control plate by angling the rat tail to create a bevel for the cable’s path.

And there it goes. Like it was made for it. Well, it (literally) was.

Just need to mark and drill the tiny holes for the mounting screws…

All four holes done.
Ready for the control plate and final fit check. I peeled the protective plastic off the vinyl, installed some Gibson-style #3 pickguard screws, and voila!

Next, I’ll get the controls located and mounted, add the Luminlay dots for control indices, and finally get to the hard part— the dual jack installation and final wiring. Check out part 3 for those.